For the last couple of months my brother and I have been working on his 1957 BSA B31 motorcycle. Approximately every Tuesday night we gather at his place to work on the bike. We started by removing the wheels to have new rims, spokes and tires fitted and are currently working on the engine. The cilinder has been bored to 400CC and we’re about to reassemble the engine. After that we still need to strip the frame and give it a new layer of paint, after that we’ll reassemble the bike and fit a new Amal MK1 Concentric carburetor to replace the Amal Monobloc.
You can watch the photo-blog here: https://goo.gl/photos/SDsVTUn5aQaWHniY9

Update: 15-may-2014
We have been working on the bike steadily for the past few months (almost every wednesday evening). The frame was recently powdercoated along with some custom fenders, engine mounting brackets and some other small parts. The cylinder was bored to approximately 400CC’s and a Honda piston was fitted too match the bore. We’ve begun reassembling the engine and tried to bolt on the cylinder head yesterday when we discovered that the firering (the protruding ring on top of the cylinder base) was higher than the depth of the corresponding groove in the cylinder head (am I still making sense?).
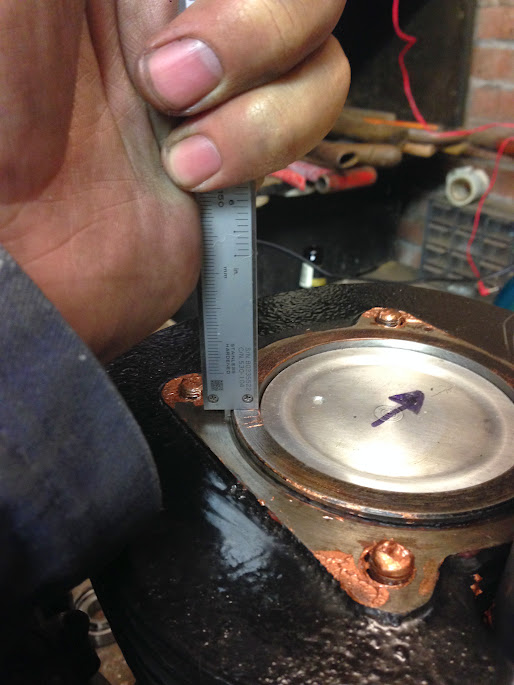

So either we have the head machined or the ring on the cylinder skimmed….
Update: 22-sept-2014
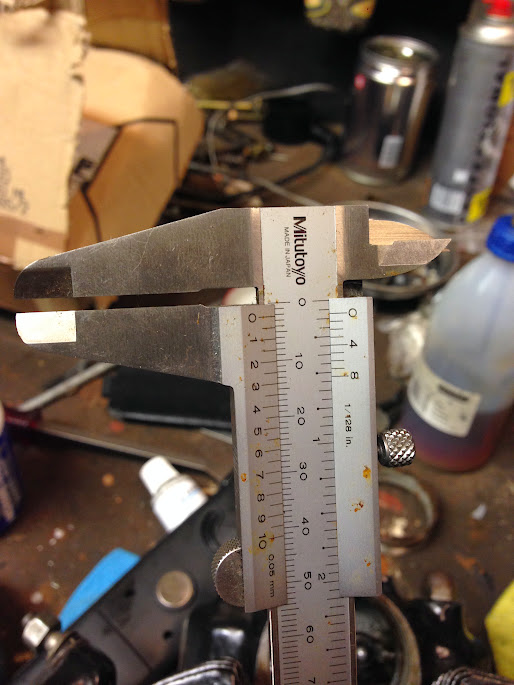
Well, as it turned out, we were wrong in thinking that the fire ring on top of the cylinder barrel should stick all the way into the groove in the head. That ring and the corresponding groove actually form the mating surface. So we put a bit of coppergrease on it and reassembled the engine.
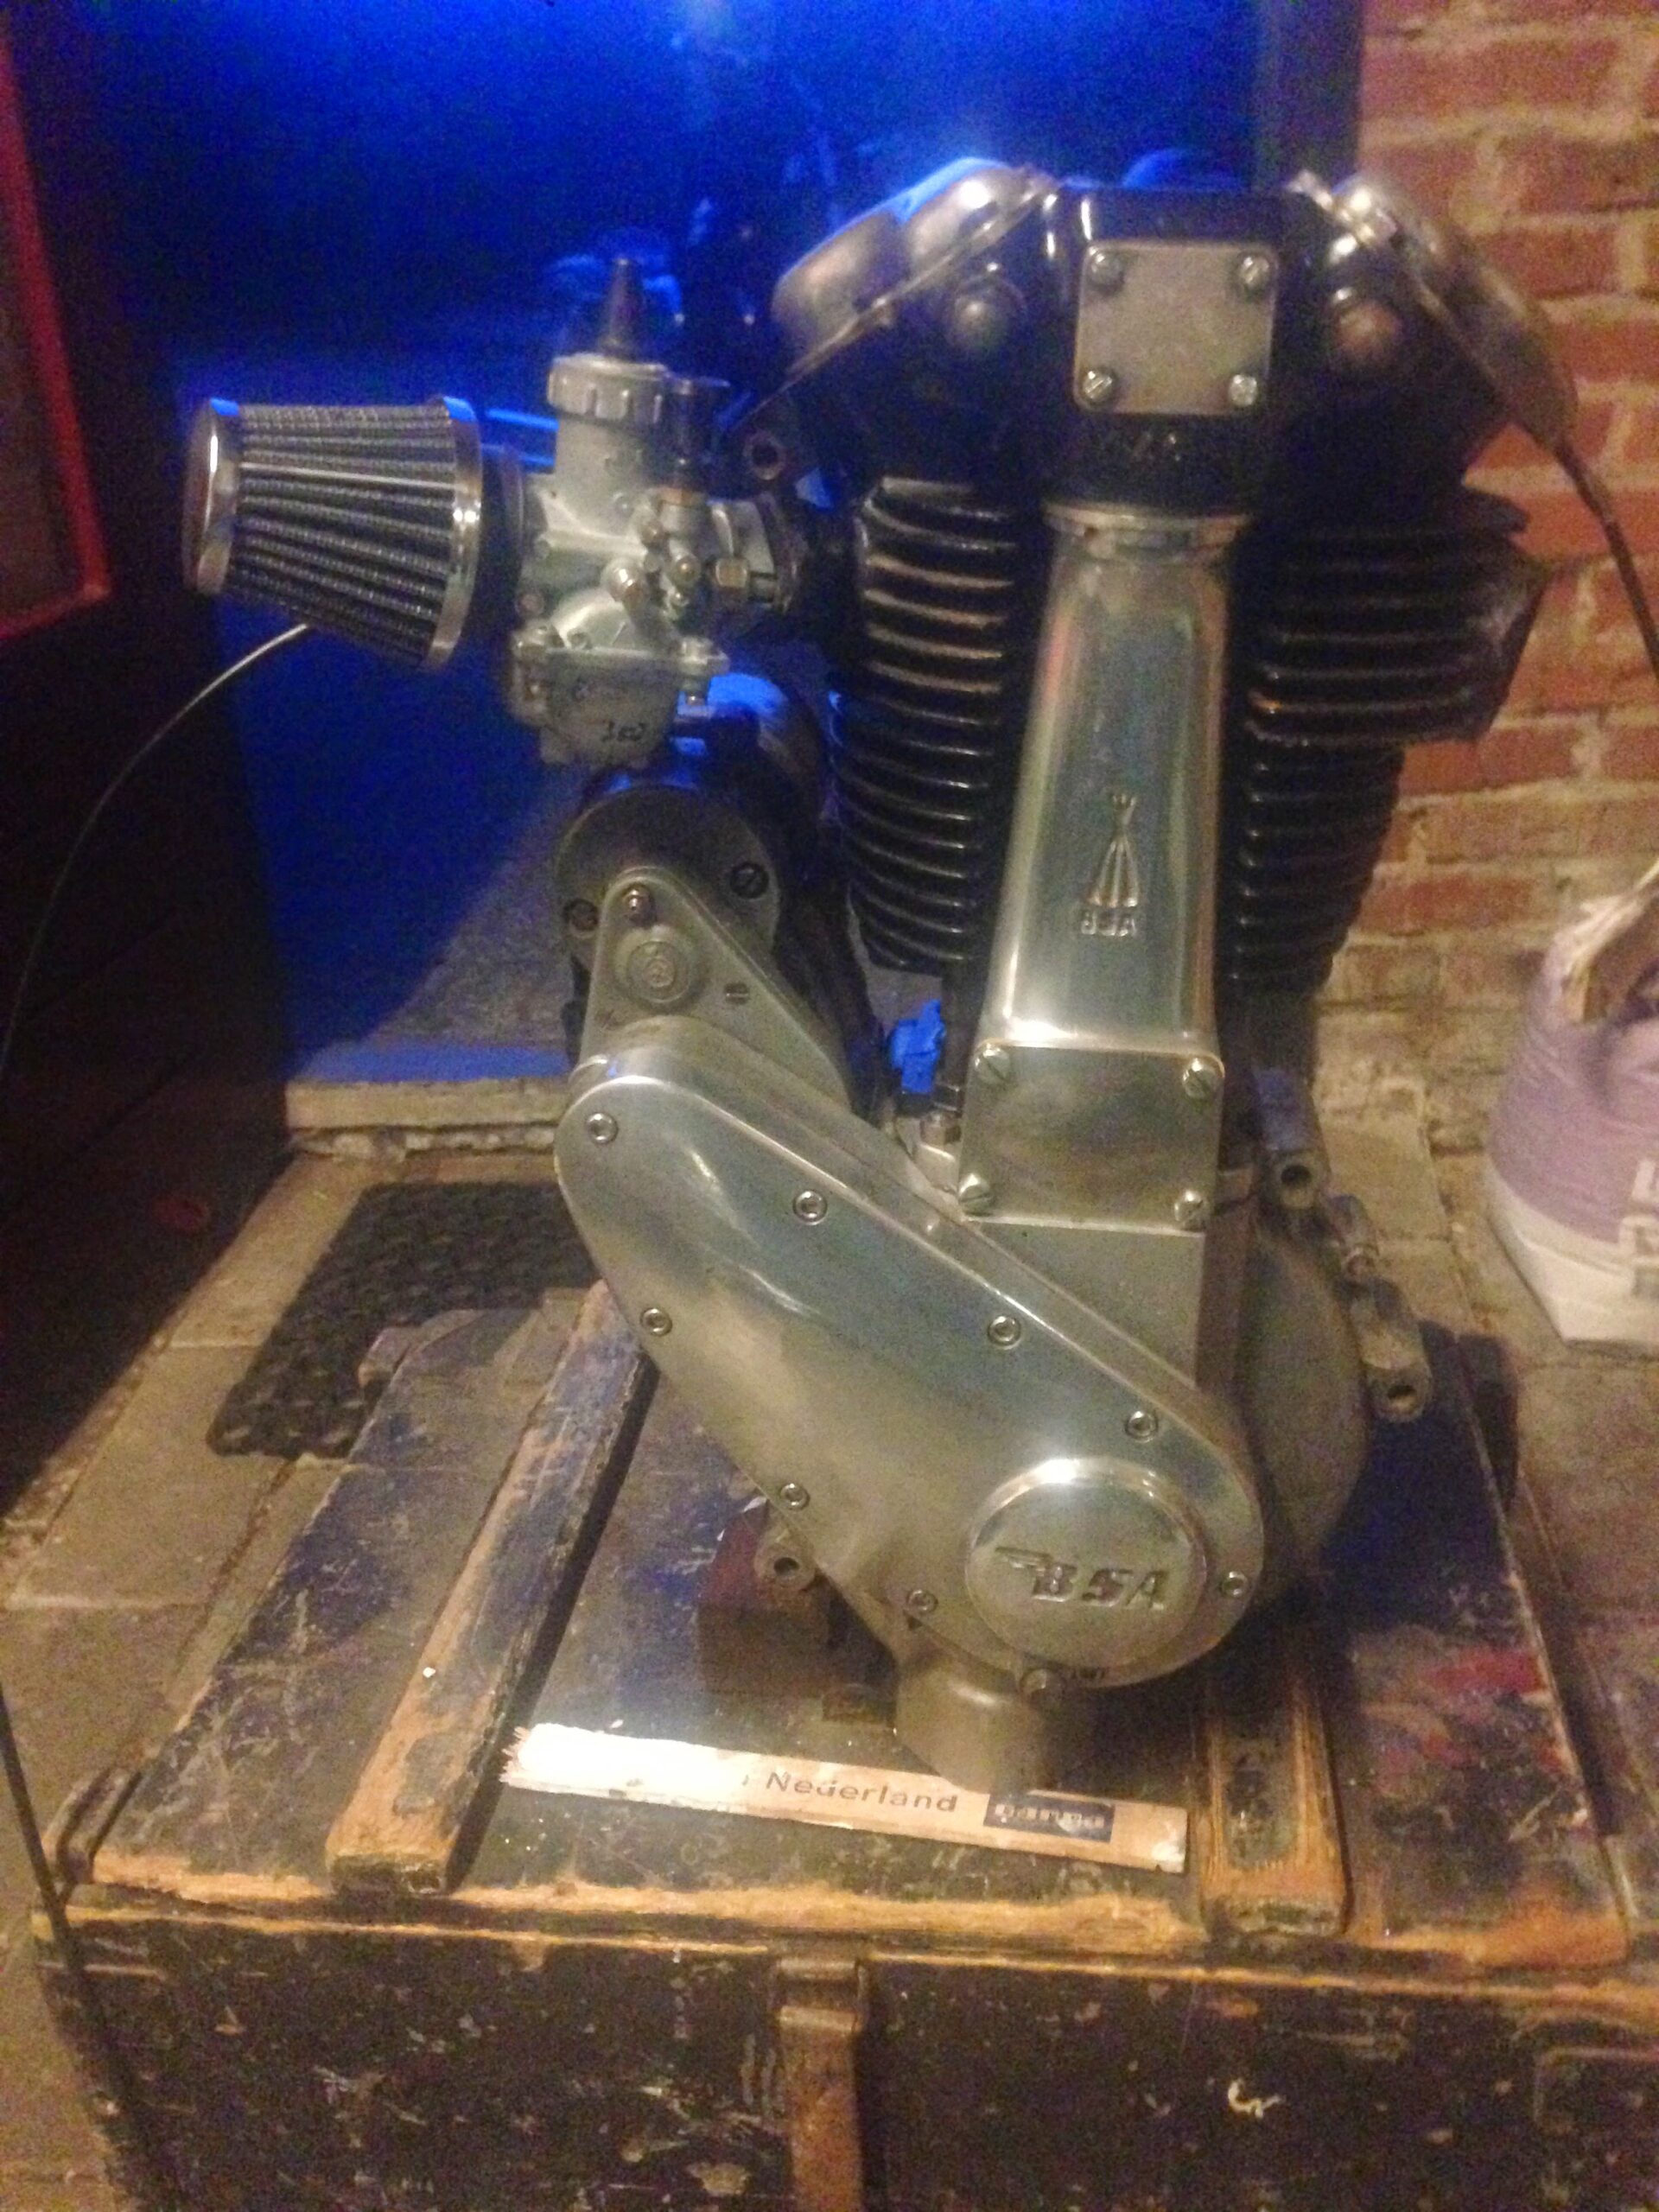
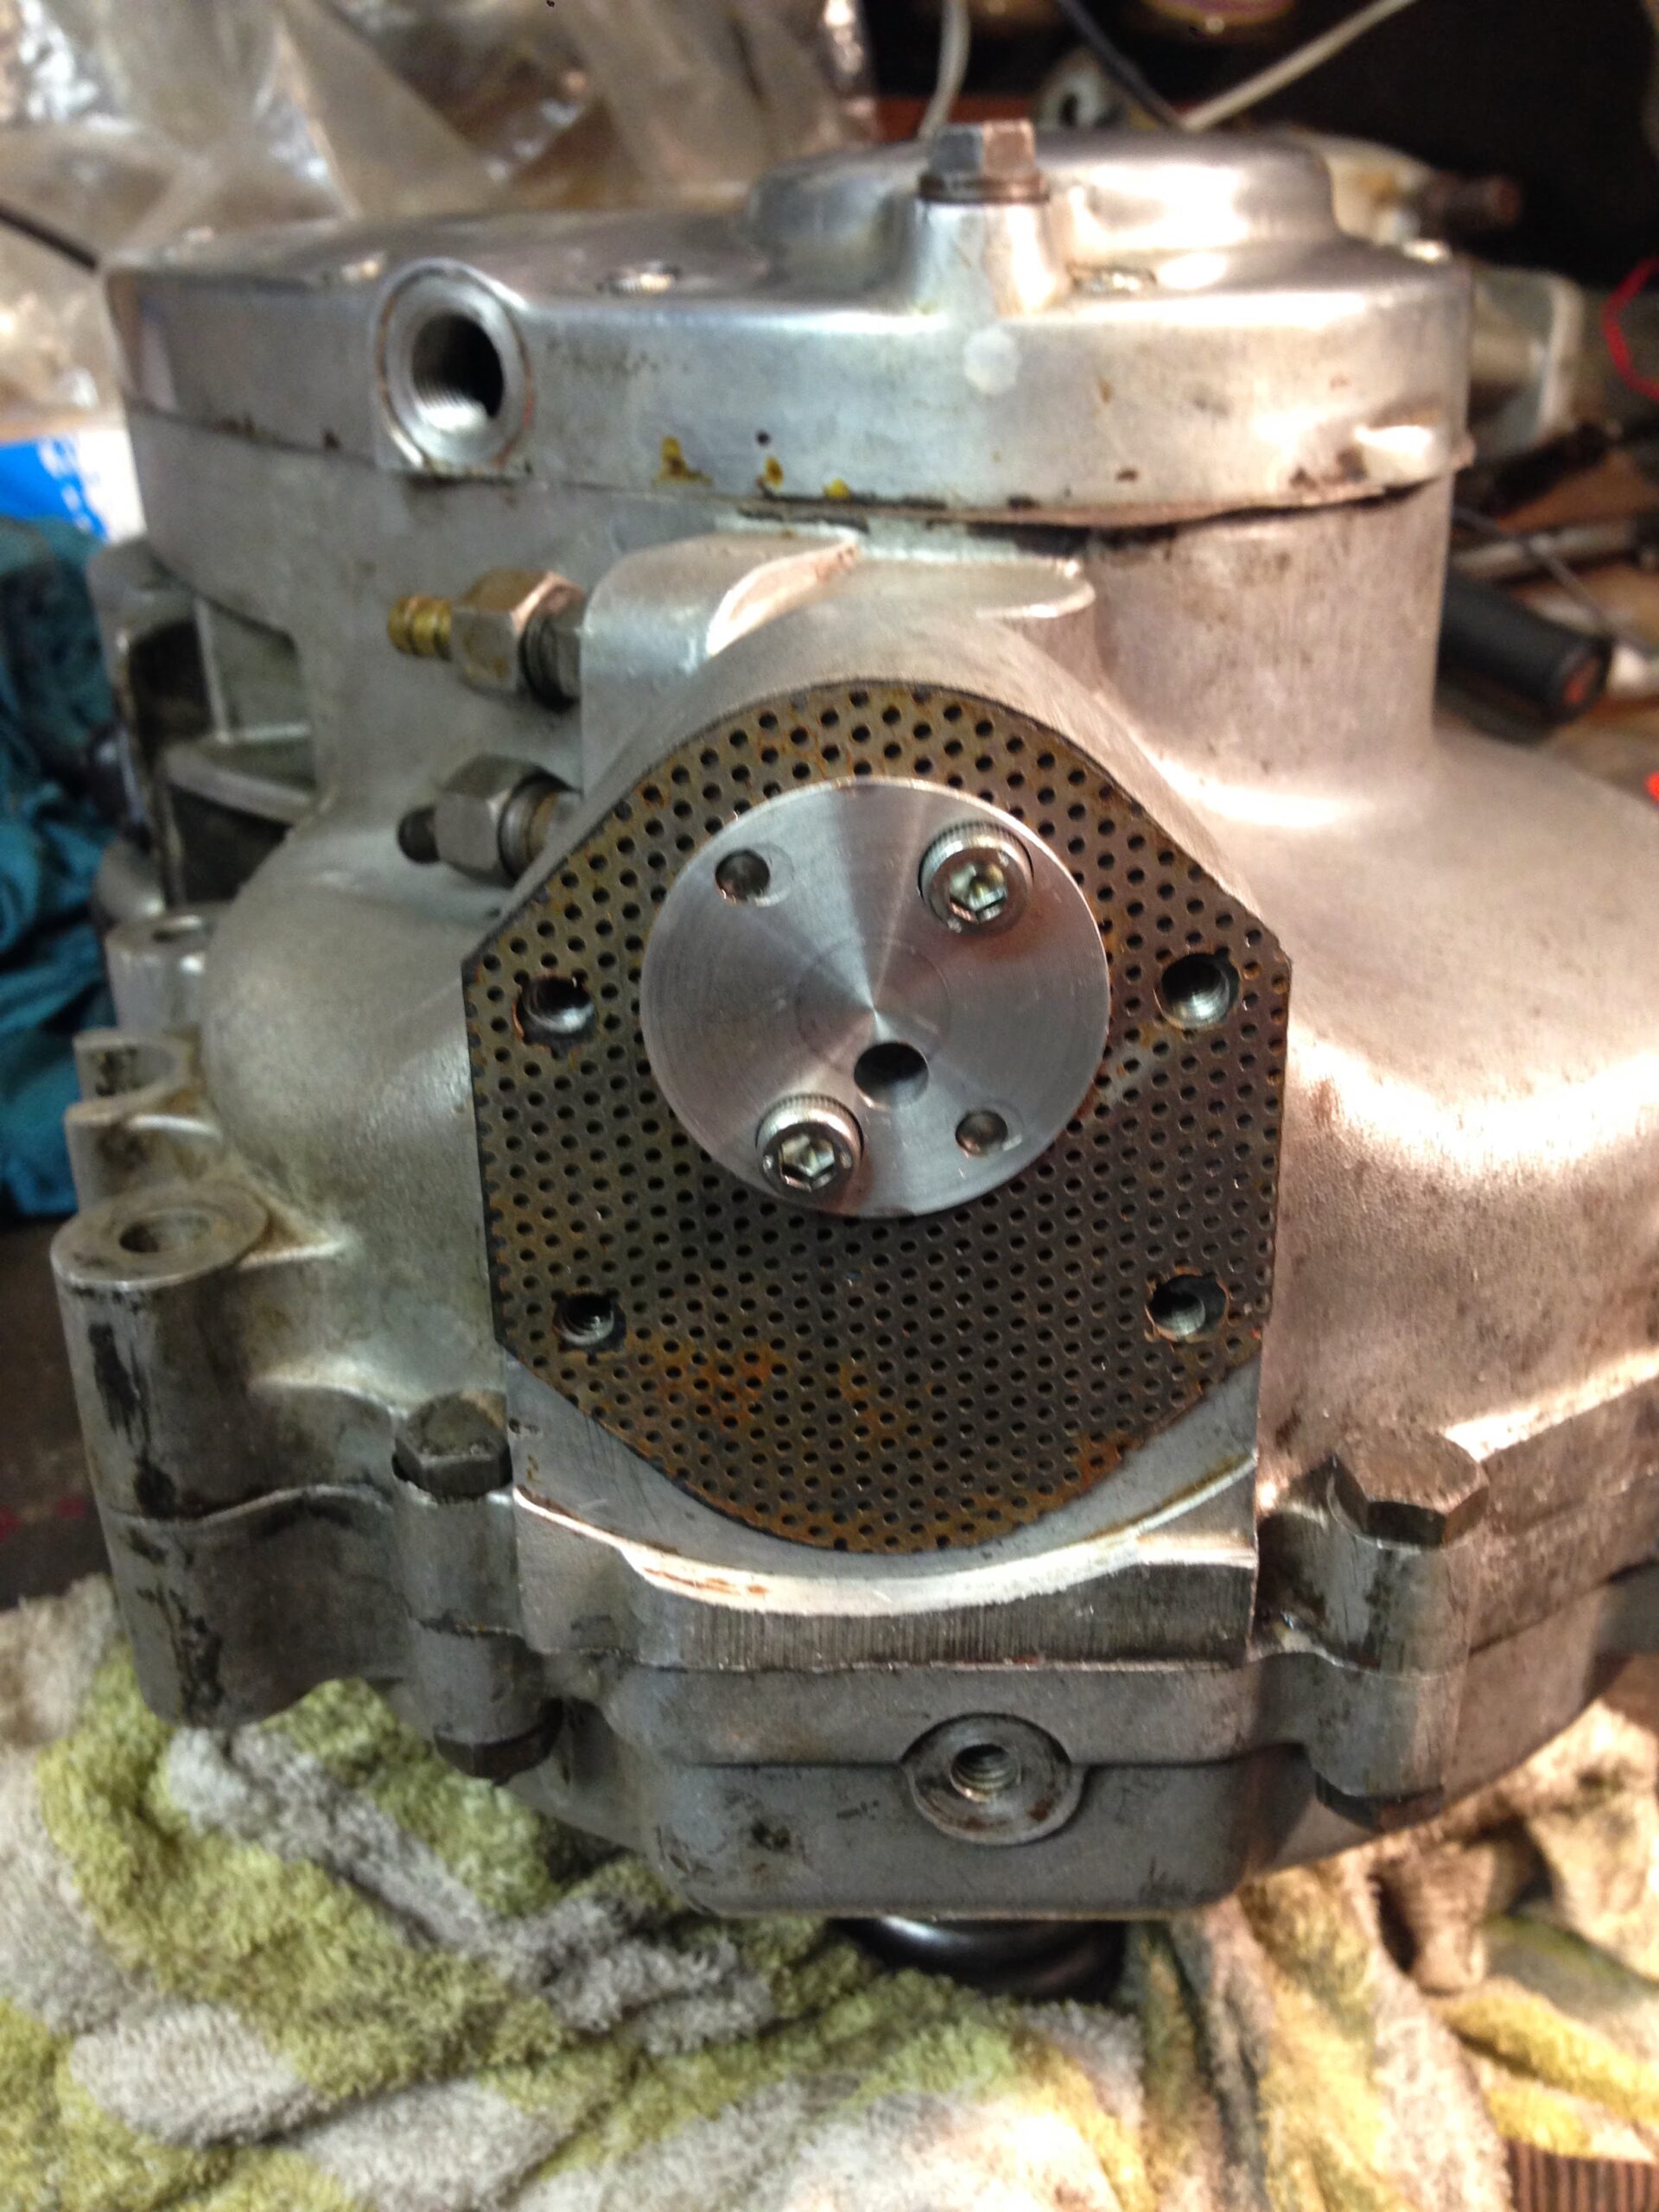
The engine is completely overhauled with new bearings and bored to 400CC’s. We also decided to invest in a more reliable oilpump made by ABSAF in Appingedam (Netherlands) and a new sump plate with magnetic drainplug by SRM Engineering.

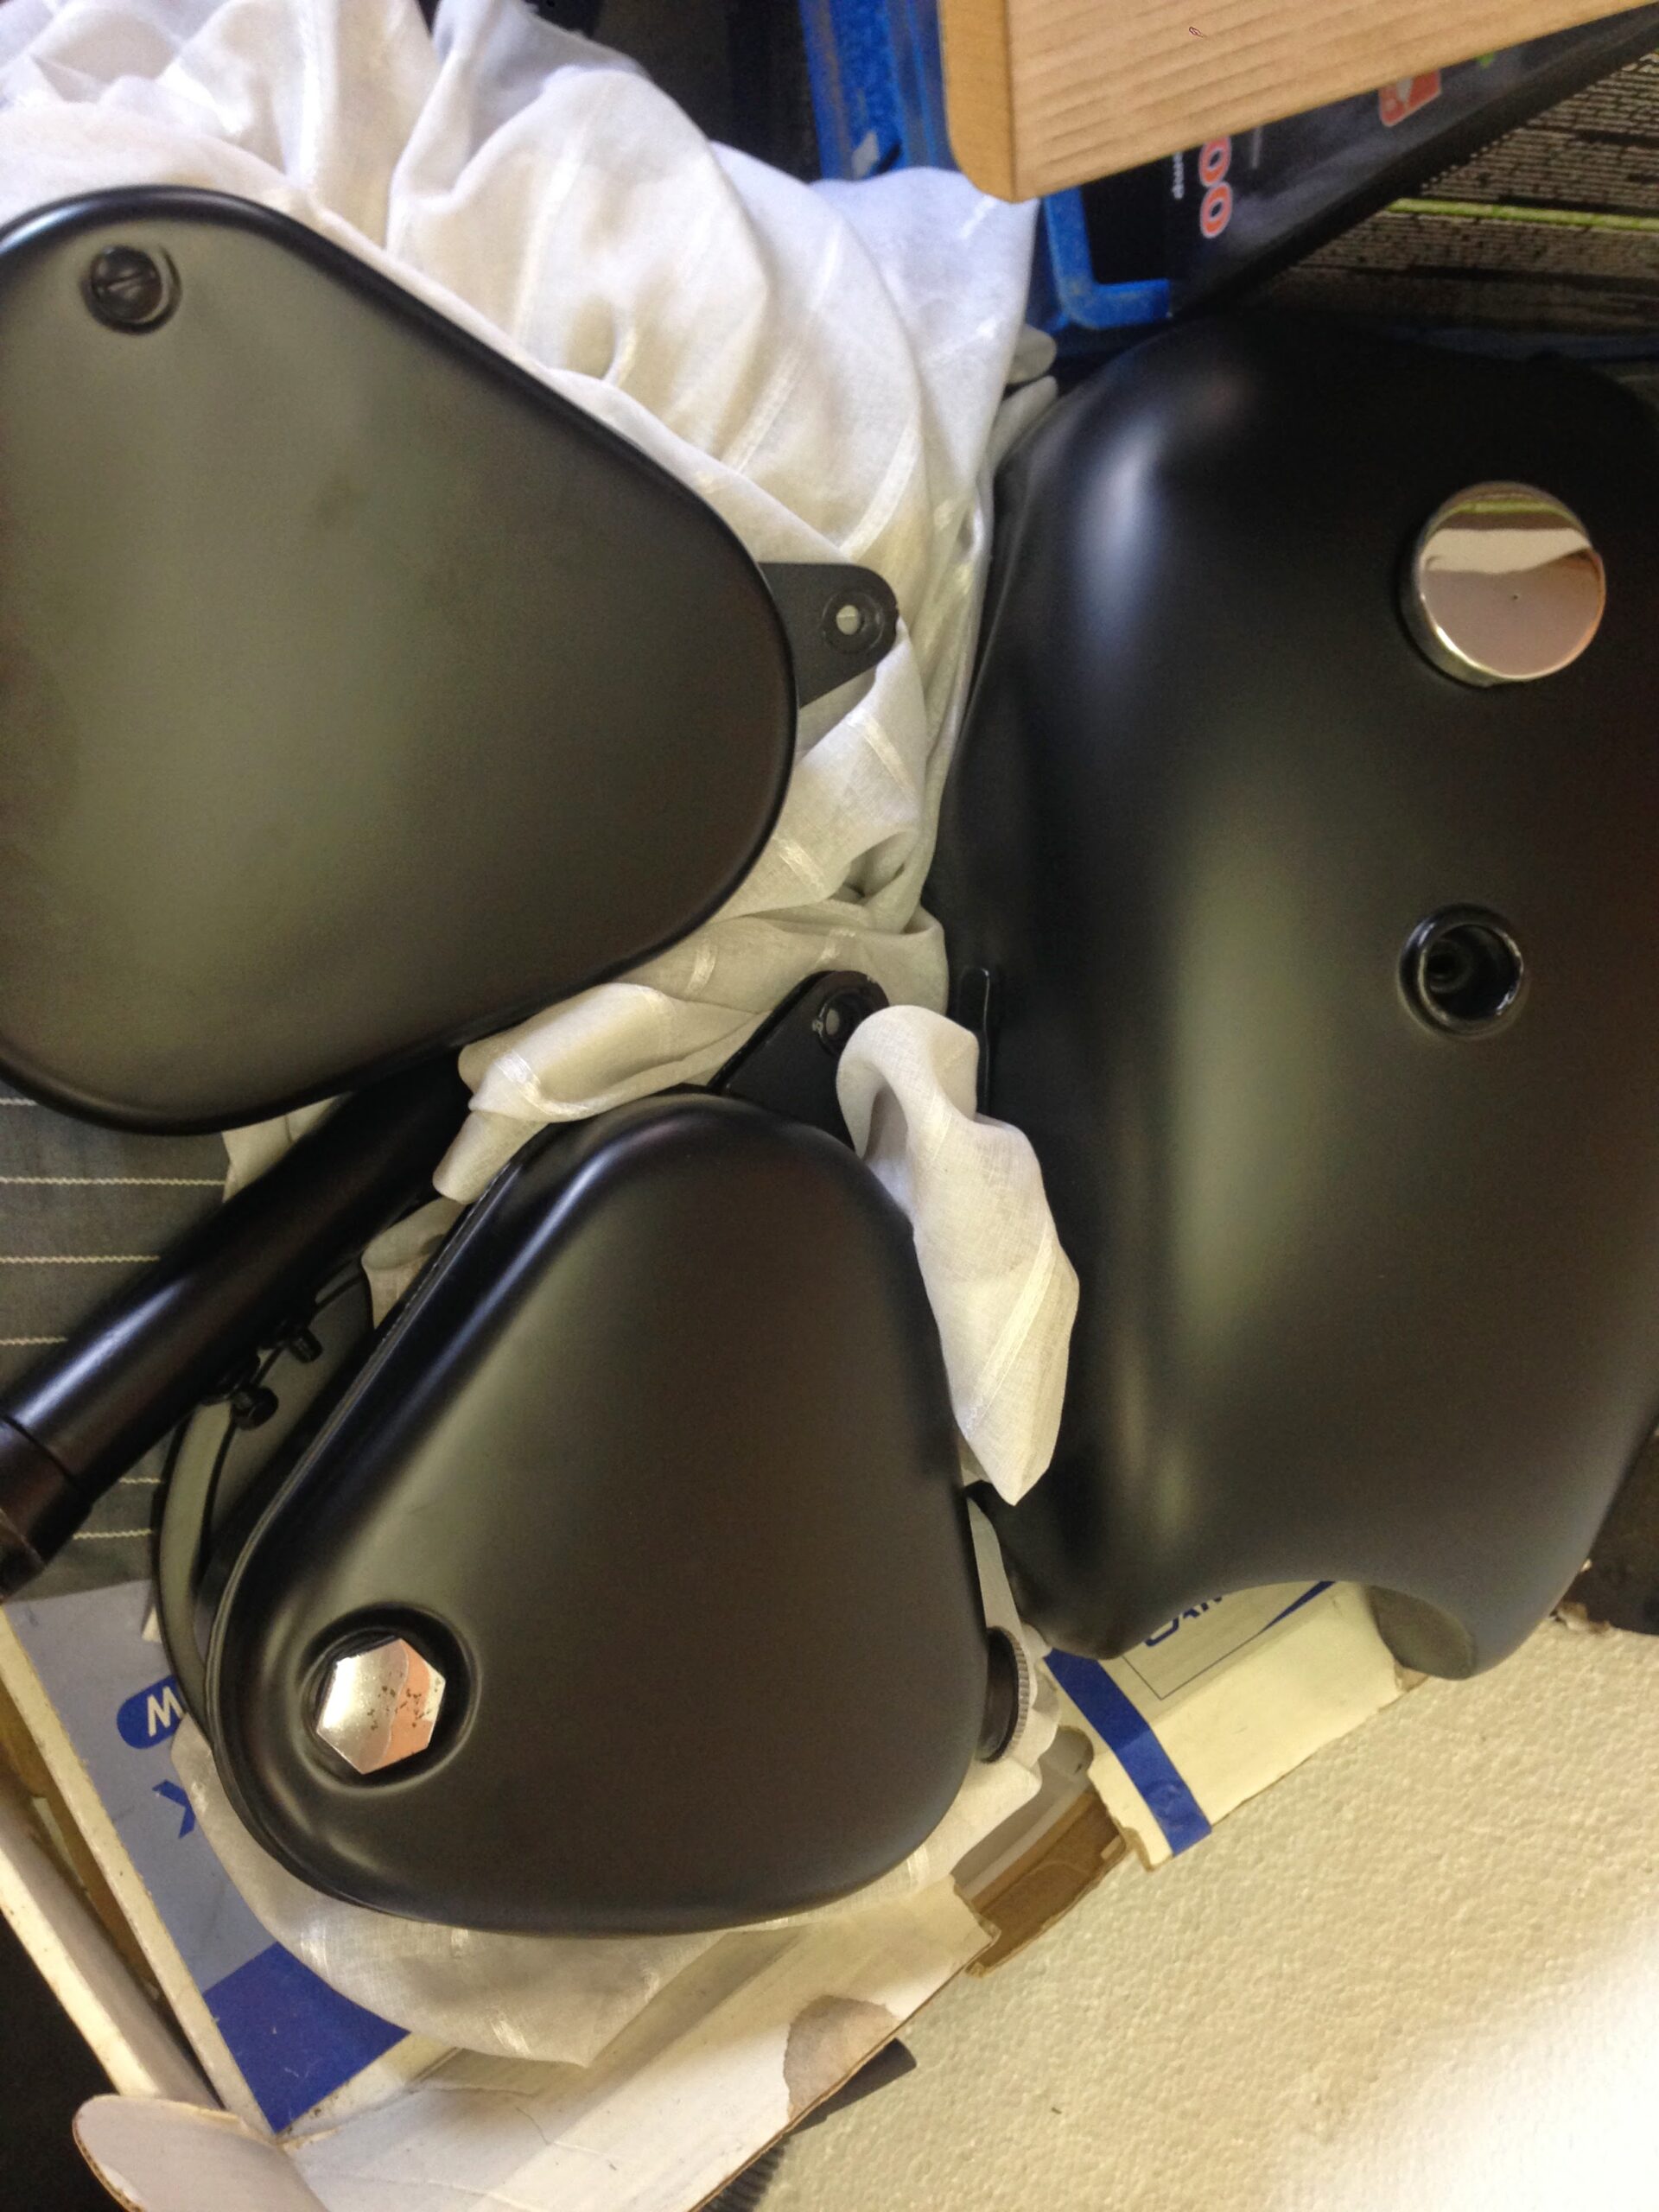
As we were reassembling the engine, the paint work on the tanks, toolbox and front fork was also finished. Very awesome job!
Time to start rebuilding the bike!
We had some difficulties with the assembly of the front fork (new bushes and oil seals), and later more difficulties with the swingarm silent blocs. The silent blocs are 2 pair of bushings that fit into the swingarm with rubber in between the 2 bushes. The problem was that we forgot about them when the swingarm went away with the rest of the frame for powder coating. So when the frame and swingarm went into the oven to finish the powder coating, the rubbers vaporized, so we had to replace them. At first we thought the biggest problem was to get to outer bushes out of the swingarm, but we later realised that it was almost just as hard getting the new ones in 🙂 We finally managed to get them in using a hydraulic press and sawing a few millimeters off the ends (because we couldn’t get them in any further).
By now we have the engine and gearbox back in the frame, and both front fork and rear swingarm installed together with the wheels.

For more pictures and comments on our first project, check out: https://goo.gl/photos/SDsVTUn5aQaWHniY9