
Now that we have the primary drive components out of the way we can proceed with the removal of the inner primary housing. But before we can remove the inner housing we need to get some stuff out of the way.
First I disconnected the wires from the solenoid and got reminded that I had forgotten to disconnect and remove the battery. (dumbass!) So always start by disconnecting the battery! (I did disconnect the spark plug wires though 🙂 )
After disconnecting and removing the battery (we need it out of the way anyway to get better clearance when we need to remove the starter motor later on) I removed the solenoid from the primary housing. To get the starter gear lever and the starter shaft out, we need to unscrew the pivot bolt, that holds the the starter gear lever, from the top of the housing. This bolt can be quite tight and there is almost no room because of the oil tank….so if you hadn’t guessed by now…..time to drain the oil tank and remove it from the frame!
After draining the oil from the tank, I disconnected the oil feed and return lines, removed the nuts from the mounting studs and lifted the oil tank out of the frame. (inspect the mounting stud rubbers and order new ones if needed!)
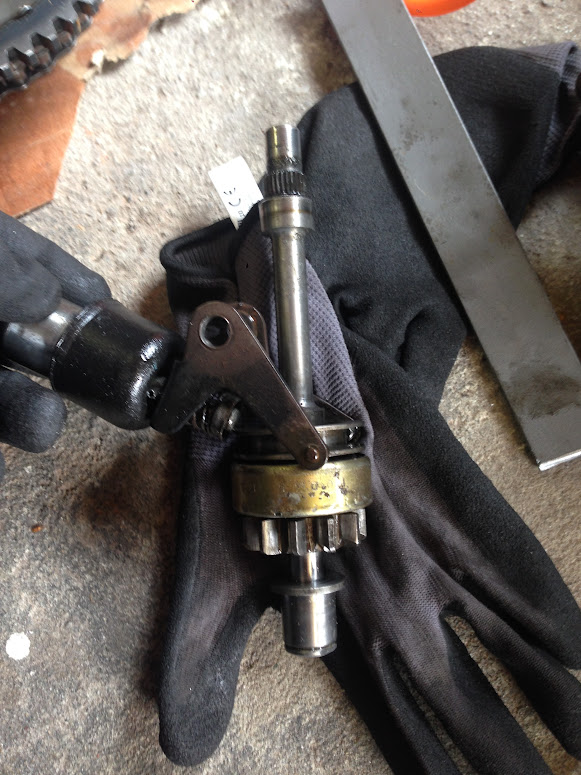
With the oil tank out of the way I could remove the pivot bolt and take out the gear lever and starter shaft assembly.
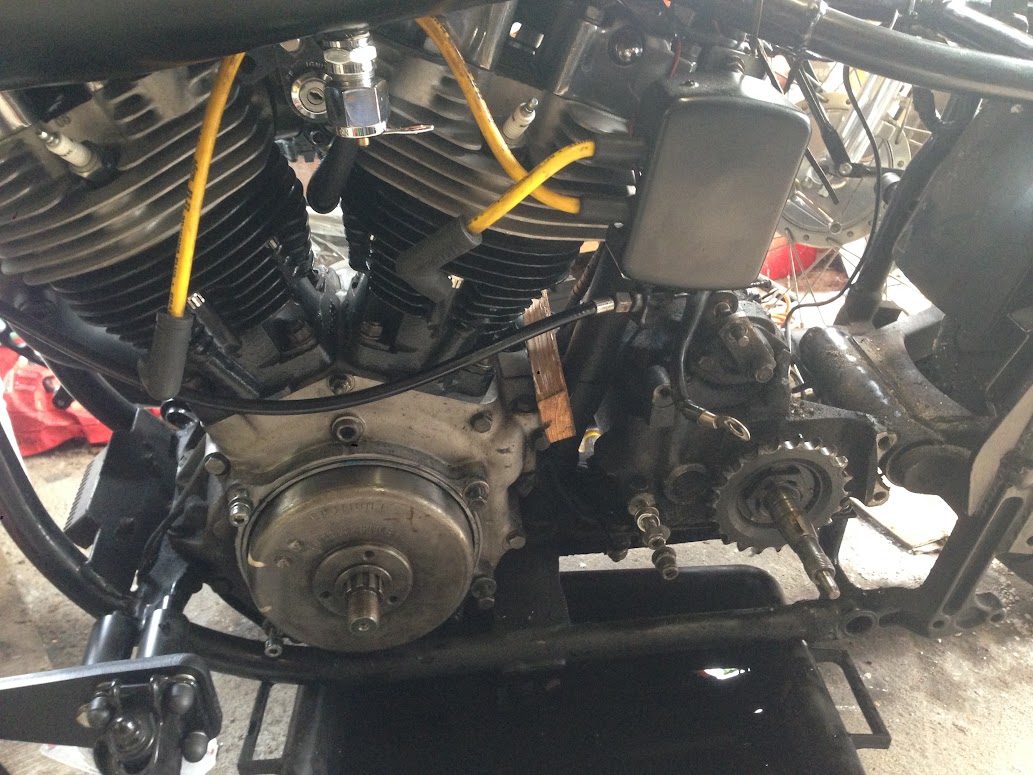
The front inner mounting bolts for the primary are secured with a safety wire, after removing the steel wire, I removed the upper and lower bolt (the center bolt doesn’t go into the crankcase), then removed the 2 rear bolts and the front 2 allen head bolts on the outside of the housing. (which were metric bolts in my case, so I first had to get a set of metric allen keys :S)
But wait…I’m forgetting something…. The starter motor is still bolted to the back of the primary 🙂
After disconnecting the wires from the starter motor, (label them! Especially if all your wires are the same shade of black, like mine :S) removed the chrome bracket from the back of the starter motor on the right side of the bike. Now it was time to unscrew the 2 studs/bolts that run through the starter motor and into the starter shaft housing on the back of the primary. (carefully lift it out as a unit, make sure you don’t pull the starter motor apart!)
Now I was finally able to get the primary out of the way and get on with removal of the gearbox 🙂
As you can see from the picture I try to make a habit out of screwing the bolts back where they came from. This can save you a lot of trouble with the reassembly!
More to come in Part #3!
One Reply to “Shovelhead 4-speed overhaul part #2”